
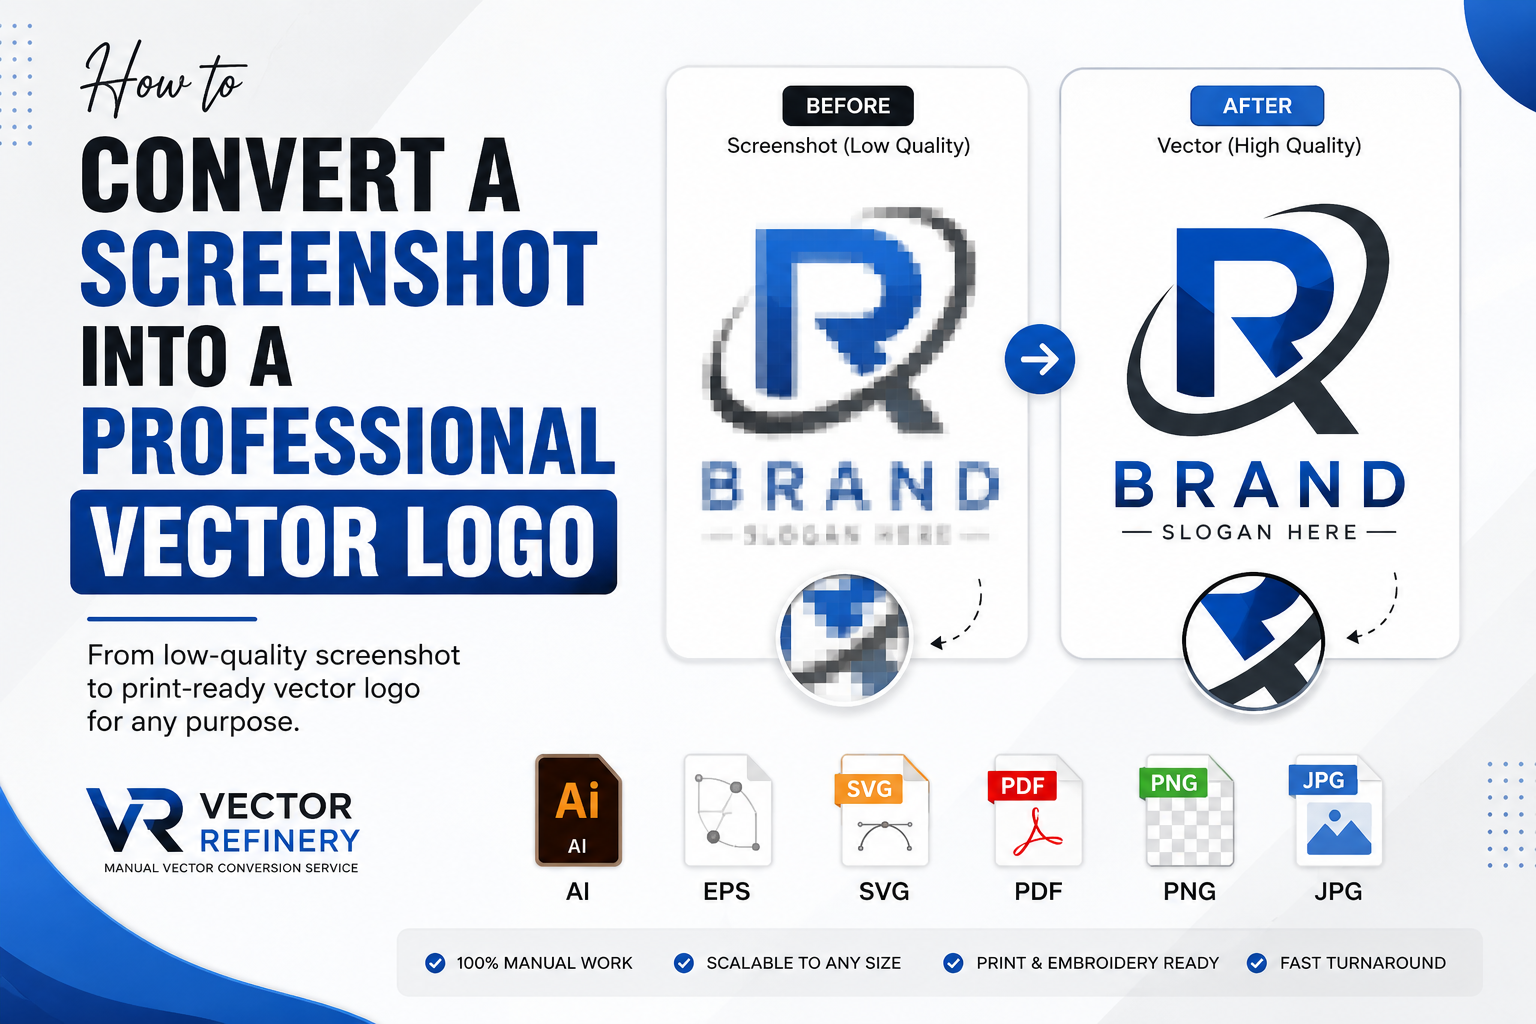
Want to convert screenshot to vector logo artwork without losing quality? Professional manual vectorization can transform a blurry or low-resolution screenshot into clean, scalable artwork for print, branding, signage, embroidery, and digital use.
Convert a screenshot to a vector logo using professional manual vectorization techniques to create clean, scalable artwork for print, branding, and digital use. Learning how to get a professional vector logo from a screenshot is essential if you’ve lost your original logo files. It happens more often than you might think. You need your company logo for a print job, a sign, a t-shirt order, or a new branding project — and the only file you can find is a screenshot. Maybe the original designer is long gone. Maybe the files were never backed up properly. Maybe you grabbed the logo from an old website and saved it as a PNG.
Whatever the reason, you are now staring at a blurry, low-resolution screenshot and wondering: can this actually be turned into a proper vector logo?
The answer is yes — but not the way most people try to do it. This guide walks you through exactly how to get a professional vector logo from a screenshot, what mistakes to avoid, and the fastest and most reliable path to a file you can actually use for production.
Why a Screenshot Is Not a Usable Logo File
Before getting into the solution, it is worth understanding the problem clearly — because a lot of people underestimate it.
A screenshot is a raster image. It is made up of pixels arranged in a grid. Every edge, curve, and color in the image is represented by individual pixels, and those pixels have a fixed size. When you scale the image up — even a little — those pixels become visible. Edges go soft. Colors bleed. Text becomes unreadable. The bigger you go, the worse it looks.
For professional use, this matters in every direction:
Print production requires sharp, clean edges at the exact size of the final output. A screenshot that looks passable on your laptop screen will look blurry and unprofessional on a business card, and completely unusable on a banner or sign.
Embroidery requires clean path data so the digitizing software can assign stitch directions correctly. A pixelated screenshot gives the digitizer nothing clean to work with, and the result is a garment that looks nothing like your intended logo.
Screen printing requires each color to be on a separate layer with hard edges. A screenshot blends colors at the pixel level, making proper separation impossible without significant manual work.
Brand consistency requires a master file that can be reproduced correctly across every medium — digital, print, physical. A screenshot cannot serve this function.
The fix for all of these problems is the same: convert the screenshot into a proper vector file. Here is how.
Option 1: Auto-Trace (Fast but Unreliable)
The first thing most people try when they need to vectorize a screenshot is auto-trace. Tools like Adobe Illustrator’s Image Trace, Inkscape’s auto-trace feature, and various free online converters can take a raster image and generate a vector file automatically.
It sounds perfect. It rarely works well.
Here is what auto-trace actually does: it reads the pixel values in your image and generates anchor points along the edges between different color regions. The more complex the image, the more anchor points it generates — and the messier the result.
For a very simple, high-contrast black-and-white icon with clean edges, auto-trace can produce a usable result. For anything more complex — a logo with multiple colors, gradients, fine linework, text, or subtle shading — auto-trace produces a file with thousands of unnecessary anchor points, jagged curves, unclean color regions, and structural problems that cause failures in professional production software.
The file might look okay on screen. But send it to a print shop, an embroidery digitizer, or a sign maker, and the problems become very visible very quickly.
Auto-trace verdict: Acceptable only for the simplest possible artwork. For anything you are going to use professionally, it is a shortcut that creates more problems than it solves.
Option 2: DIY Manual Redraw in Illustrator (Time-Consuming and Skill-Dependent)
If you have access to Adobe Illustrator or Affinity Designer and some experience with vector tools, you can manually redraw your logo from scratch using the screenshot as a reference.
This is actually the right approach — it is exactly what professional vectorization artists do. The difference is the skill and time required to do it properly.
Here is the basic process:
Step 1 — Place the screenshot in Illustrator. Open a new document and place your screenshot as a locked reference layer. Reduce its opacity to around 50% so you can see what you are drawing on top of it.
Step 2 — Use the Pen tool to trace each shape. Working shape by shape, use the Pen tool to draw clean Bézier paths that follow the outlines of each element in your logo. This requires a working understanding of anchor points, handles, and curves.
Step 3 — Apply flat color fills. Once each shape is drawn, fill it with the correct color. Try to match the original colors as closely as possible. If you know the brand’s Pantone or hex values, use those. If not, use the eyedropper tool on the screenshot as a starting point and adjust as needed.
Step 4 — Handle typography. If your logo includes text, identify the font and set the type using the same or closest matching typeface. If the font is custom or unidentifiable, the letterforms need to be redrawn as paths by hand — the most time-consuming part of the process.
Step 5 — Clean up and export. Remove the reference layer, check all paths for cleanliness, group elements logically, and export in the required formats: AI, EPS, SVG, PDF, and PNG.
Done properly, this produces a genuinely professional result. The problem is that it requires real skill, time, and access to professional software. For someone who is not an experienced vector artist, the learning curve is steep and the result is often not production-quality.
DIY verdict: Great if you have the skills and time. For most business owners and non-designers, not a practical option.
Option 3: Professional Manual Vectorization Service (Fastest and Most Reliable)
The fastest, most reliable, and most cost-effective path to a professional vector logo from a screenshot is to use a professional manual vectorization service.
This is what Vector Refinery does. You upload your screenshot — even a low-resolution, blurry, or pixelated one — and a professional vector artist manually redraws every element of your logo from scratch. The result is a complete, production-ready vector file package delivered to your inbox in as little as 24 hours.
No auto-trace. No shortcuts. No structural problems that come back to haunt you at the print shop.
Here is exactly what the process looks like from your end:
Step 1 — Take the best screenshot you can. Before uploading, do what you can to get the highest quality version of the logo. If the logo appears on a website, try right-clicking and saving the image rather than screenshotting it — the saved file is often higher resolution. If the logo is on a printed document, scan it at 300 DPI or higher rather than photographing it. The better the reference, the more accurately the artist can match the original design.
Step 2 — Upload your file and describe your needs. At Vector Refinery, you upload your screenshot along with any notes about the logo — colors, fonts, specific details you want preserved, intended use cases. The more information you provide, the better the result.
Step 3 — Receive your assessment. Before any work begins or payment is required, you get a free assessment confirming the price and turnaround time for your specific logo. No surprises.
Step 4 — Approve and receive your files. Once you approve, the artist gets to work. Standard orders are delivered within 24 hours. You receive a complete file package: AI, EPS, SVG, PDF, transparent PNG, and a black-and-white version. If anything needs adjustment, revisions are included.
Step 5 — Use your vector files for everything. With your clean vector files in hand, you can print at any size, embroider, produce signage, create merchandise, update your brand guidelines, and hand files to any designer or print shop with confidence.
Professional service verdict: The right choice for anyone who needs a production-ready result quickly and reliably, without needing design skills or software.
Screenshot Logo vs Professional Vector Logo
| Feature | Screenshot Logo | Professional Vector Logo |
|---|---|---|
| Image Quality | Pixel-based and loses quality | Perfectly sharp at any size |
| Scalability | Limited | Unlimited |
| Print Quality | Poor for large printing | Commercial print ready |
| Editable | No | Fully editable |
| Embroidery Compatible | Usually not | Yes |
| Vehicle Wraps & Signage | Not recommended | Ideal |
| Logo Color Editing | Very limited | Easy to modify |
| Transparent Background | Usually unavailable | Supported |
| Professional File Formats | PNG / JPG | AI, EPS, SVG, PDF, PNG |
| Best Use | Online preview only | Print, Branding, Web & Marketing |
A screenshot may work for viewing on a screen, but it isn’t suitable for professional branding or commercial printing. A professionally recreated vector logo provides unlimited scalability, clean editing, and production-ready quality for everything from business cards to billboards.
What Makes a Good Screenshot for Vectorization
Not all screenshots are created equal. Here is how to give your vectorization artist the best possible reference to work from.
Bigger is better. The larger the screenshot in pixels, the more detail the artist has to work with. If the logo appears somewhere at a large size — a website header, a presentation slide, a PDF — capture it from there rather than from a small thumbnail.
Avoid compression artifacts. JPG files compress image data and introduce visible artifacts around edges and in color regions. If you can, save the logo as a PNG rather than a JPG — PNG is lossless and preserves edge quality much better.
Capture on a plain background. If possible, screenshot the logo against a white or solid color background rather than over a complex image or texture. This makes the edges of the logo clearer and easier to trace accurately.
Include all elements. Make sure the full logo is visible in the screenshot — including any taglines, icons, and surrounding elements you want preserved in the vector version. Do not crop too tightly.
Note the colors. If you know your brand colors — Pantone numbers, hex codes, or CMYK values — include them with your upload. This ensures the vector file matches your brand standards exactly, rather than being matched visually from the screenshot.
Even with a low-quality screenshot, a skilled vector artist can produce an excellent result. These tips simply make the process easier and the result more accurate.
Can Any Screenshot Be Vectorized?
Almost always, yes — though the complexity of the artwork affects the price and turnaround time.
Simple logos — flat colors, clean shapes, basic typography — can be vectorized quickly and accurately from even quite low-resolution screenshots. The simplicity of the design means there is less detail to recreate and less room for interpretation.
Complex logos — multiple colors, detailed illustration, fine linework, shading, intricate typography — require more time and a higher level of skill. Very low-resolution screenshots of complex logos may require the artist to make informed interpretation decisions about fine details. This is why noting your brand colors and any specific details you want preserved is helpful.
Very degraded or blurry screenshots can still be vectorized, but the result will depend on how much of the original design intent is still readable. A screenshot that has been screenshotted multiple times, heavily compressed, or captured at very small size will have lost some detail that even a skilled artist cannot fully recover. If you have any other reference — a printed version, an old brochure, a business card — providing that alongside the screenshot helps.
There is essentially no screenshot that cannot be converted into a usable vector file. The question is only how much detail can be faithfully preserved.
How Much Does It Cost to Vectorize a Screenshot?
The cost depends on the complexity of the artwork, exactly as with any logo vectorization project. At Vector Refinery, the pricing is transparent and straightforward:
Basic — $25 For simple logos and icons with flat colors and minimal complexity. Includes AI, SVG, and PNG files with 1 revision. Delivered within 48 hours. This tier covers the majority of straightforward screenshot-to-vector jobs.
Standard — $45 For business logos with multiple elements, text, and moderate complexity. Includes the full file package — AI, EPS, SVG, PDF, PNG, and black-and-white version — with 2 revisions and priority support. Delivered within 24 hours. This is the most popular option for professional use.
Premium — $85 For complex artwork with detailed illustration, many colors, or fine linework intended for print and embroidery production. Includes the full file package, print and embroidery optimization, unlimited revisions, and priority 12–24 hour delivery.
Not sure which tier applies to your screenshot? Upload it and get a free assessment with an exact quote before any payment is required.
Common Mistakes to Avoid
Trying to use the screenshot directly. The most common mistake is sending a screenshot to a print shop or embroidery service and hoping it will work. It will not — or the result will be visibly poor quality. Take the extra step of getting a proper vector file first.
Relying on auto-trace for anything complex. Auto-trace is tempting because it is instant and free. For anything beyond the simplest artwork, it produces a file that fails in production. The money you save using auto-trace is usually spent later fixing the problems it creates.
Choosing the cheapest possible service without checking quality. On freelance marketplaces, $5–$10 services often deliver auto-traced files with minimal cleanup, passed off as professional vectorization. Check for before-and-after portfolio samples before placing an order anywhere.
Not specifying your brand colors. If you have Pantone, hex, or CMYK color values for your logo, always provide them. Without them, the artist matches colors visually from the screenshot — which is close but not exact, and may not meet your brand standards.
Not asking for all the formats you need. Before placing your order, think through every application you will need the logo for. Print, embroidery, web, presentations, brand guidelines — each may require a different format. A good vectorization service delivers a complete file package, but it is worth confirming upfront.
Why Vector Refinery for Screenshot Vectorization
Vector Refinery has built a reputation as one of the most trusted manual vectorization services available — with over 500 completed projects, a 5.0 client rating, and Top Rated status on Upwork.
Every project is 100% manually redrawn by a skilled vector artist. No auto-trace. No automated tools. No shortcuts. The result is a clean, production-ready vector file that performs correctly in every professional context — print, embroidery, signage, screen printing, brand design, and beyond.
The service handles screenshots, photographs, blurry PNGs, JPGs, scanned artwork, hand-drawn sketches, and any other raster reference. If you can see the logo, it can be vectorized.
Frequently Asked Questions
Can you vectorize a very blurry or low-resolution screenshot? Yes. Even heavily degraded screenshots can be manually redrawn into clean vector files. Very low-resolution images may result in minor interpretation of fine details, but the overall logo will be faithfully recreated. Providing any additional reference — printed versions, brand color codes — helps improve accuracy.
What is the best way to capture a screenshot for vectorization? Use the largest available version of the logo. Right-click and save images from websites rather than screenshotting them. Save as PNG rather than JPG. Capture against a plain background where possible.
How long does it take to vectorize a screenshot? Standard orders at Vector Refinery are delivered within 24 hours. Premium complex artwork is delivered within 12–24 hours. Most simple logos can be completed faster.
What file formats will I receive? A complete package including AI, EPS, SVG, PDF, transparent PNG, and black-and-white versions. All formats needed for print, digital, embroidery, and brand use are included in Standard and Premium packages.
Can you match my exact brand colors from a screenshot? The artist will match colors as closely as possible from the screenshot visually. For exact brand color matching, provide your Pantone, hex, or CMYK values with your order.
What if I need the logo for embroidery specifically? The Premium package includes embroidery optimization — proper color separation and path structure for embroidery digitizing. Mention embroidery as your intended use when placing your order.
Is there a free quote before I pay? Yes. Upload your screenshot at Vector Refinery and receive a free assessment with an exact price and turnaround time before any payment is required.
Published by Vector Refinery — Professional Screenshot to Vector Conversion and Logo Vectorization Service. Visit vectorrefinery.com to upload your file and get started.
